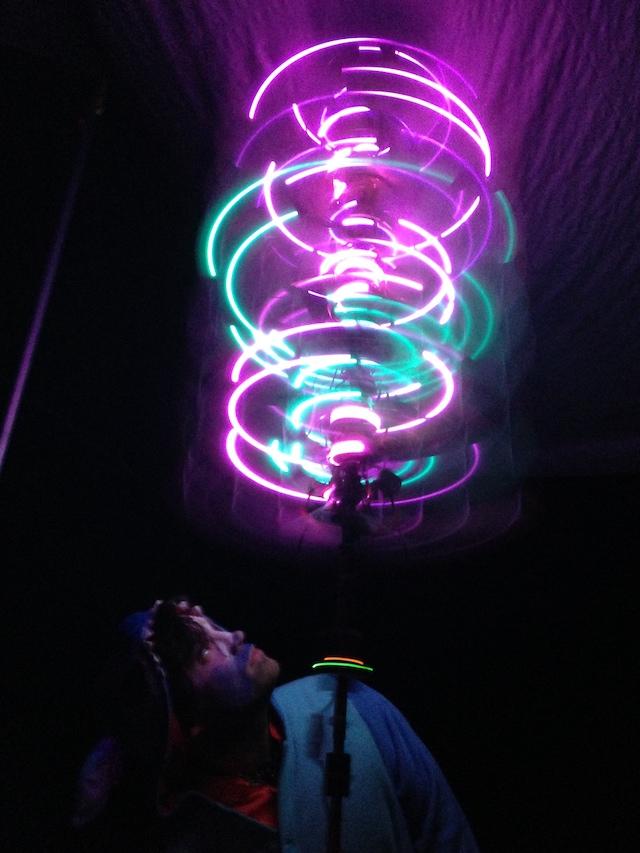
Iterating the Design of a Volumetric Display
Eric Mika and I started in on a project to make a cylindrical volumetric display using off the shelf hardware like a drill and a long steel rod from Home Depot. The project evolved into iterations designed around first transferring LED data through a slip ring, then trying to minimize the harmonic vibration in the rig by changing the size and the shape of the display, and recently, increasing the density of the lights along with networking drivers together.
The video below shows our first attempt at seeing what kind of visual we could get out of simply strapping a loose LED strip and an EL wire.
In our next rig, Eric came up with a nice wiring configuration for a Teensy strapped to four foot rod rotated by a corded drill. We had to replace the rod we bought from Home Depot with one we got from McMaster in order to get less variation in the straightness of the stainless steel.

Our first iterations just had loose LED strips attached to the rod with zip ties. We found that the shock from the rotation was killing LEDs. Backing the strips with a rigid material, like cut up strips of window frames, helps protect the LEDs from broken connections. Eric rigged up a servo motor to hold down the drill's trigger in a nice bit of hacking.
Even though we bought a precisely manufactured rod, leaving one end of the rotation axis unpinned seemed to cause a lot of violent vibrations. Adjusting the strips to surround the rod helped, as did weighing down the cabinet we used to house the drill. The vibration decreased as the speed of the rotation increased, however, we did not always get a smooth transition from stop to full speed.
The LEDs need a fast refresh rate to create the smallest arcs possible. Changing the speed of the rotation along with the duration of the runloop for the LED driver affects the lengths of the arcs of the strip. We did not achieve pinpointed light in this iteration, but we were able to achieve some interesting patterns.
Eric coded up an iOS app that let us change the LED color data. We took the display to a music festival and set it up outside.

Using Robotics Components
A few years after our first attempt, I bought some robotics components from ServoCity and Fry's Electronics to construct a new motor housing for a hanging version of the display. I was interested in trying to see if a smaller display, with a different shape, might minimize some of the problems we experienced with the first design. The sketch below shows the original SketchUp screenshot for the second iteration:

Two challenges came up in this design. The first challenge was that I had a smaller slip ring that did not have a bore hole through the center, so I was forced to mount the slip ring outside of the rotating components. I needed to use a hollow rod to take the wires down to the LED strips. The hollow rod I got from Amazon was imprecisely manufactured, and I shaved down the entire surface of the rod with a Dremel so that it would fit inside the bearings.
The second challenge was attaching all the wires inside of the rotating components. The lengths were not idea for connections and wrapping. I did end up using CAT5 cable for most of the connections, and I would do this again when working at this scale.

The second iteration's display was in the shape of a sphere, based solely on some LED strips I found on Adafruit. I mounted a pair of identical rings on two round mirrors mounted inside crochet frames so that light would be emitted on both sides of the rotating surface.

The videos below show the test pattern running before the mounts were attached to the hanging and in the first run of the rotation.
For kicks, I attached some material during the test to see what diffusion might look like:


Increasing the density of the display
In the third iteration of the design, I am primarily concerned with the density of the display, and how to achieve control out of synchronized, network drivers. These panels are not fast enough to get a good volumetric image, but they will be good enough to prototype this display's size, shape, and networking synchronization.

This display will be driven from a depth map generated by the iPhone front facing depth camera, or an Intel RealSense D415, and the housing will be pinned at both ends once the power distribution and the networking are solved.
©2023, Secret Atomics